Monday, March 11, 2019

Salsa Chicken Bowls

Adapted from BudgetByte's Salsa Chicken Meal Prep Bowls

Ingredients
1 c. brown rice
1/2 T. butter
2 c. water

2 large boneless, skinless chicken breasts
12 oz. Habenero salsa
1 c. water + 1 t. chicken bullion paste or 1 c. vegetable broth

2 bell peppers: 1 red, 1 orange
1 small sweet onion, slivered
1/2 T. sunflower seed oil
pinch salt

2 green onions, sliced
1/4 c. minced cilantro
1 c. plain 2% Greek yogurt

Directions
Preheat the oven to 425ºF.

Add the water and butter to a medium size pot.  Rinse the rice until the water runs clear.  Bring to a boil and add the rice.  Place the lid on the pot. lower the heat and cook according to package directions, about 30 minutes.  Remove the lid and fluff the rice with a fork.


While the rice is cooking, begin the chicken. Add the chicken breasts to a medium sauce pot along with the salsa, broth or water and bullion.  Stir to coat chicken.

Place a lid on the pot and bring it to a boil over high heat. Once the liquid starts boiling, turn the heat down to low and let the chicken simmer over low for 25 minutes. Make sure it's simmering the whole time, adjusting the heat slightly if needed.

While the rice and chicken are cooking, prepare the bell peppers. Slice the bell peppers into 1/2-wide strips. Place them on a baking sheet and drizzle with cooking oil. Toss the peppers to coat them in oil, then sprinkle with a pinch of salt.

Roast the peppers in the preheated oven for 20-25 minutes, or until they are browned on the edges, stirring once half way through.

After the chicken has simmered for 30 minutes, remove it from the salsa mixture and use two forks to shred the meat. Return the shredded chicken to the pot of salsa and stir to combine.

Once the rice has rested, the chicken has been shredded, and the peppers have finished roasting, it's time to build the bowls.

Add about 3/4 c. rice to each container, followed by 1/4 of the roasted peppers, and 1/4 of the shredded chicken. Spoon the salsa mixture from the pot over the shredded chicken in the containers. This will act as a sauce to help moisten the entire dish. Top with green onions, cilantro, and 1/4 c. Greek yogurt.  Serve immediately or refrigerate for up to 4 days.  (You may want to store the yogurt separately if reheating the dish later.)

Nutrition Facts
Servings 4.0
Amount Per Serving
calories 396
% Daily Value *
Total Fat 10 g 15 %
Saturated Fat 3 g 17 %
Monounsaturated Fat 4 g
Polyunsaturated Fat 1 g
Trans Fat 0 g
Cholesterol 155 mg 52 %
Sodium 671 mg 28 %
Potassium 850 mg 24 %
Total Carbohydrate 30 g 10 %
Dietary Fiber 3 g 11 %
Sugars 7 g
Protein 52 g 104 %
Vitamin A 41 %
Vitamin C 184 %
Calcium 11 %
Iron 7 %

Sunday, March 10, 2019

Viking Soup

Adapted from Viking Soup

Ingredients

2 c water
1 c white wine
1 c vegetable (or chicken) stock
1 yellow onion
3 celery stalks
2 cloves garlic
1 T olive oil
small fennel bulb
½ fresh lemon
1 bay leaf
8 peppercorns
1 tsp. salt
1 seafood combo pack (clams, cod, prawns and scallops)
2 tsp. butter
crusty bread for dipping


Directions
To be updated...

First, we're going to make up a batch of Court Bouillon to serve as our soup base. In a medium pot, add the water, wine, ½ of the yellow onion (chopped), 2 of the stalks of celery (chopped), 2 fennel stalks (chopped), the peppercorns, the ½ lemon (squeezed and then tossed in) the bay leaf and ½ tsp. salt. Let this come to a boil and then simmer for about 15 minutes, swirling every once in a while to combine.

When the bouillon is done, strain the veggie chunks out and reserve the liquid for your soup base. In the bottom of a stock pot, add the olive oil, about 3 T of minced onion, about 3 T of minced fennel bulb, about 3 T of minced celery and the garlic. Sauté over medium heat until softened, about 3 minutes.
Pour the bouillon into the pot and add another cup of liquid. (Vegetable stock/broth is preferred, but you can use chicken stock or water in a pinch.) Add ½ tsp. salt and bring it to a simmer. Now add the clams and let them cook for about 3 minutes (they should be starting to open at 3 minutes) and then add the remainder of the fish - cod, scallops and prawns.
Fold to combine and simmer (a very low boil, if at all) for about 4 minutes or until the prawns are cooked through. Ladle into soup bowls and if you want to get fancy you can add a heaping teaspoon of butter in the middle of each dish. Let the butter melt into the soup, and serve with hunks of crusty bread and a chilled glass of white wine (or ale, if you're feeling your inner Viking!) and... enjoy!

Nutrition Facts

DIY "Orange Vitamin Water Zero" a.k.a., Stevia-Sweetened Orangeade, Plain or Sparkling

Adapted from Homemade Sports Drink

Ingredients
1/2 T. stevia powder
1/2 T. lemon juice
2 T. orange juice concentrate
1/16 t. salt
4 oz. ice cubes
12 oz. cold water or seltzer

Directions
Add first four ingredients and stir vigorously to dissolve the OJ.  Add ice and water.  Stir.  Enjoy!

Concentrated Option
Add 1/4 c. stevia powder, 1/4 c. lemon juice, 1/4 t. salt, and 1 c. orange juice concentrate with enough cold water to fill a pint jar.  Mix 1:8 concentrate:water in a glass to drink.  Enjoy!

Nutrition Facts
Servings 1.0                 1 pint
Amount Per Serving
calories 15
% Daily Value *
Total Fat 0 g 0 %
Saturated Fat 0 g 0 %
Monounsaturated Fat 0 g
Polyunsaturated Fat 0 g
Trans Fat 0 g
Cholesterol 0 mg 0 %
Sodium 9 mg 0 %
Potassium 67 mg 2 %
Total Carbohydrate 4 g 1 %
Dietary Fiber 5 g 22 %
Sugars 0 g
Protein 0 g 1 %
Vitamin A 0 %
Vitamin C 22 %
Calcium 0 %
Iron 0 %

Thursday, January 3, 2019

Homemade Instant Kahlua


Ingredients
1 c. raw sugar
1 c. water
1/2 c. instant espresso powder
1/4 c. pure vanilla extract
1 c. cheap vodka

Directions
Mix sugar, water, and espresso in a pan.  Bring to a low boil and reduce by half, about ten minutes, stirring occasionally.  Let cool.  Mix in vanilla and vodka.  Stir.  Makes 2 1/4 c.  Store in a 2 c. jar, maybe in the refrigerator as this has much less sugar than most of the recipes I found.  Drink the remainder.

Nutrition Facts

Saturday, November 3, 2018

Zucchini Bacon Onion Frittata

Adapted from Zucchini-Onion Frittata

Ingredients
olive oil pan spray
1/2 T. ea. extra-virgin olive oil and salted butter
1/2 medium zucchini, finely diced, ~1.5c.
1/4 sweet yellow onion, finely diced, ~0.5c.
3 strips lean uncured bacon, finely chopped
4 large eggs
8 egg whites
1/4 c. 2% milk
ground chipotle pepper, black pepper, paprika, to taste
1/4 c. shredded fresh basil
1/2 c. shredded asiago, romano, or parmesan cheese

Directions
Preheat oven to 350˚F.  Saute zucchini, onion, and bacon in the butter and oil in a cast iron skillet.  Whisk eggs, egg whites, milk, and seasonings in a quart bowl.  Mix in the grated cheese and basil.  Let the vegetables cool.  Coat 12 standard-size muffin cups with cooking spray.  Divide filling and evenly among muffin cups.  Divide the egg mixture evenly.  Bake for 18 minutes until set.

Nutrition Facts
Servings 4.0
Amount Per Serving
calories 286
% Daily Value *
Total Fat 14 g 22 %
Saturated Fat 6 g 29 %
Monounsaturated Fat 2 g
Polyunsaturated Fat 1 g
Trans Fat 0 g
Cholesterol 207 mg 69 %
Sodium 532 mg 22 %
Potassium 183 mg 5 %
Total Carbohydrate 5 g 2 %
Dietary Fiber 1 g 2 %
Sugars 4 g
Protein 21 g 42 %
Vitamin A 14 %
Vitamin C 3 %
Calcium 6 %
Iron 7 %

Bell Pepper and Potato Frittata

Adapted from Bell Pepper and Potato Frittata

Ingredients
olive oil pan spray
1/2 T. ea. extra-virgin olive oil and salted butter
1 large red bell pepper, finely diced, ~1 c.
1/4 sweet yellow onion, finely diced
5 small yellow potatoes, finely diced, ~1c.
4 large eggs
8 egg whites
1/4 c. 2% milk
ground chipotle pepper, to taste
1/2 t. Penzey's Paris seasoning blend or Litehouse Salad or Poultry Herb blend
1/2 c. shredded pepperjack cheese

Directions
Preheat oven to 350˚F.  Saute bell pepper, potato, and onion in the butter and oil in a cast iron skillet.  Whisk eggs, egg whites, milk, and seasonings in a quart bowl.  Mix in the grated cheese.  Let the vegetables cool.  Spray a 9"x9" glass baking dish with olive oil.  Spread the vegetables evenly in the dish.  Pour in the egg mixture evenly.  Bake for 25 minutes until set.

Nutrition Facts
Servings 4.0
Amount Per Serving
calories 288
% Daily Value *
Total Fat 11 g 18 %
Saturated Fat 4 g 22 %
Monounsaturated Fat 3 g
Polyunsaturated Fat 1 g
Trans Fat 0 g
Cholesterol 200 mg 67 %
Sodium 644 mg 27 %
Potassium 128 mg 4 %
Total Carbohydrate 14 g 5 %
Dietary Fiber 1 g 4 %
Sugars 3 g
Protein 18 g 37 %
Vitamin A 32 %
Vitamin C 90 %
Calcium 15 %
Iron 10 %

Wednesday, October 24, 2018

Cinnamon Roll Monkey Bread

Adapted from The Ultimate Healthy Monkey Bread

Ingredients
Dough
1.5 c. warm nonfat milk (100-110°F)
1/2 T. unsalted butter, melted
3 T. raw sugar
1/2 t. salt
4.5 t. (14g or two ¼-oz packages) dry yeast
3.5 c. heritage-grain AP white whole wheat flour

Coating
1/2 c. warm nonfat milk (100-110°F)
1 T. unsalted butter, melted
7/8 c. brown sugar
1.5 T. ground cinnamon

Directions
To prepare the dough, stir together the milk, butter, sugar, and salt in a large bowl. Sprinkle the yeast on top, and wait 10-15 minutes or until the mixture turns frothy. Mix in the flour. If the dough is still wet, continue stirring in flour 2 T. at a time until the dough begins to pull away from the sides of the bowl.  Knead, using a stand mixer, until the dough springs back most of the way when you gently press your index finger into it. Shape the dough into a ball, and let the dough rest while preparing the filling.

Coat a 12-cup bundt pan with neutral oil, such as sunflower seed oil. To prepare the coating, whisk together the milk and butter in a small bowl. Stir together the sugar and cinnamon in a separate small bowl.

Using a sharp serrated knife, cut the dough into 16 pieces (cut in half, then half again, then half again, then half one more time). Roll each piece into a short rope, and cut each rope into at least 5 pieces. (Re-flour your hands and work surface if the dough is too sticky!) This should yield 80+ small pieces of dough.

Working with one small piece of dough at a time, dip it into the bowl with warm milk and butter with one hand. Let the excess drip off; then roll it around in the bowl of cinnamon and sugar with your other hand. Place into the prepared bundt pan. Repeat with the remaining small pieces of dough, layering them evenly into the bundt pan.

Lay a clean, dry towel over the top of the bundt pan, and place it in a warm draft-free place to let the dough rise for 30-45 minutes, or until it has doubled in size or fills ¾ of the bundt pan.

Preheat the oven to 350°F. Bake for 22-25 minutes or until the sides of the dough pieces on top feel firm to the touch. Cool for 5-10 minutes before inverting onto a serving plate.


Nutrition Facts
Servings 16.0
Amount Per Serving
calories 149
% Daily Value *
Total Fat 2 g 2 %
Saturated Fat 1 g 3 %
Monounsaturated Fat 0 g
Polyunsaturated Fat 0 g
Trans Fat 0 g
Cholesterol 3 mg 1 %
Sodium 20 mg 1 %
Potassium 62 mg 2 %
Total Carbohydrate 28 g 9 %
Dietary Fiber 3 g 12 %
Sugars 11 g
Protein 5 g 9 %
Vitamin A 2 %
Vitamin C 0 %
Calcium 7 %
Iron 8 %

Wednesday, September 19, 2018

Pear Clafoutis (Flaugnarde)


Adapted from Cooking Light's Comice Pear Clafoutis

Ingredients
Salted butter for the dish
2 firm-ripe Comice pears (1 lb. total), peeled, cored, and sliced lengthwise about 1/3 in. thick
1 c. whole milk
2 large eggs
4 egg whites, or 1/3 c.
1/4 c. sugar
1 1/2 t. vanilla extract
1 t. orange zest or 1/6 t. orange extract
1/8 t. nutmeg, preferably freshly grated
1/4 t. kosher salt
1/4 c. flour
1/4 c. whey protein powder
Powdered sugar, optional for garnish

Directions
Preheat oven to 350°. Butter a shallow 3-qt. glass baking dish (9"x9") and arrange pears in an attractive pattern over the bottom. (Fruit will rise to the top as batter is poured in.)

Put milk, eggs, granulated sugar, vanilla, orange zest or extract, nutmeg, salt, and flour (in this order) in a blender and whirl until very smooth and frothy, 1 minute. Pour batter over pears.

Bake until clafoutis is well browned and a little puffed, about 50 minutes.

Let clafoutis cool on a rack about 15 minutes. Serve warm, sprinkled with powdered sugar.

Nutrition Facts
Servings 4.0
Amount Per Serving     1/4 dish
calories 227
% Daily Value *
Total Fat 5 g 7 %
Saturated Fat 2 g 10 %
Monounsaturated Fat 1 g
Polyunsaturated Fat 1 g
Trans Fat 0 g
Cholesterol 100 mg 33 %
Sodium 305 mg 13 %
Potassium 218 mg 6 %
Total Carbohydrate 26 g 9 %
Dietary Fiber 2 g 7 %
Sugars 22 g
Protein 14 g 28 %
Vitamin A 4 %
Vitamin C 5 %
Calcium 12 %
Iron 3 %

Monday, September 3, 2018

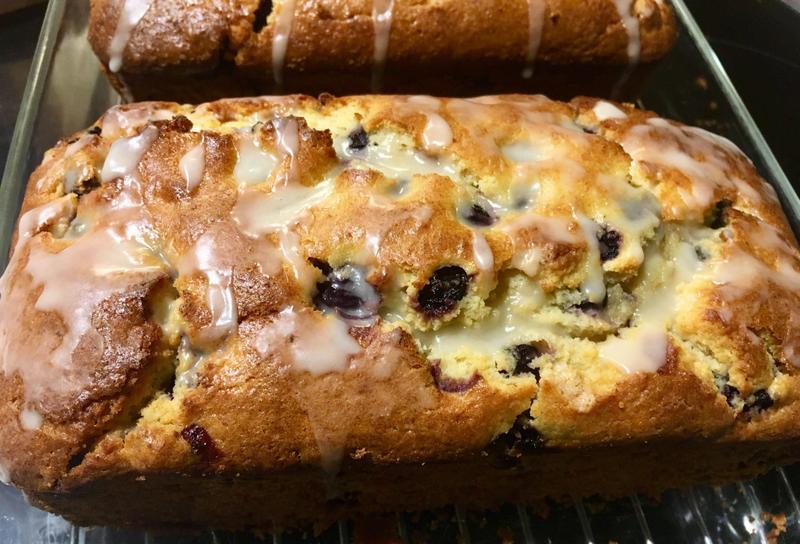
Blueberry-Lemon Ricotta Pound Cake


Adapted from Eating Well's Blueberry-Lemon Ricotta Pound Cake

Ingredients
Cake
3/4 c. granulated sugar
5 T. unsalted butter, at room temperature
3 large eggs, at room temperature (see Tip)
1/4 c. part-skim ricotta cheese
2 T. lemon zest, or 1.5 t. powdered lemon zest
2 T. lemon juice
1 t. vanilla extract
1.5 c. unbleached heritage-grain flour
2 t. baking powder
1/2 t. salt
2 c. fresh blueberries
Additional flour for dusting the berries

Icing
2 T. packed confectioners’ sugar
1.5 t. lemon juice
1/8 t. lemon extract
1/8 t. powdered lemon zest

Directions
Preheat oven to 325°F.

Butter a 9-by-5" glass loaf pan and line the bottom with parchment paper.

Beat sugar and butter in a large bowl with an electric mixer on medium-high speed until creamy.

Beat in eggs, one at a time, until fully incorporated.

Reduce the mixer speed to medium-low and beat in ricotta, lemon zest, 2 T. lemon juice, and vanilla until just combined.

Sift flour, baking soda, and salt together on top. With the mixer on low speed, beat until almost combined.

Toss the blueberries with enough flour to coat and gently fold into the batter.  (This should minimize extra wetness and the tendency to make the cake blue.)

Transfer to the prepared pan. Bake the cake until starting to brown around the edges and a tester inserted in the center comes out clean, about 1 hour.  (1:50 with foil covering the browned tops for the last 50 minutes, probably because I didn't flour the blueberries, and I used frozen.)

Let cool in the pan on a wire rack for 20 minutes. Run a knife around the edge to loosen the cake, then invert it onto the rack. Carefully turn it right-side up. Let cool completely.

In a small bowl, add sifted confectioners' sugar and zest, then whisk in lemon juice and extract until smooth. Brush the glaze on the cake.

Make Ahead Tip: Wrap cooled cake airtight and store at room temperature for up to 1 day; glaze shortly before serving.

Room-temperature eggs make cakes fluffier. Here's a quick trick—place them (in the shell) in a bowl of lukewarm water for about 5 minutes.

• Needs more lemon in the cake!  Try this recipe next time.

Nutrition Facts

Sunday, August 19, 2018

How to Pare Down Belongings or Prepare for Moving


I wrote this elsewhere geared towards an oversized wardrobe, but much of it can easily be adapted to other belongings.

In no particular order:
  • Use a new one of these approaches every week or month.  New approaches will give you fresh eyes when an old approach gets more difficult.
  • Consider all of these options first and choose your favorite(s).  It will also make it easier if you get to choose the approach that seems easiest to you.  Make sure you at least calculate savings from getting rid of storage and estimate what a physical or online sale might bring in, whether or not you choose those options.
  • Take pictures of all items with sentimental value: old concert T-shirts, a favorite jacket from school with fond memories associated, etc.
  • Remove all items with holes, stains, missing buttons, broken zippers, etc.  Some of these can be donated/recycled.  I know quilters who donate the smallest leftover scraps to a program that turns the material into rags (if I remember correctly), and fleeces can be recycled.  You might call fabric stores to find the first type of program if online searching doesn't help.  Contact outdoor clothing stores like Patagonia and Columbia that sell fleeces to inquire about fleece recycling.  Some stores offer discounts on new fleece when you bring in old items.
  • Calculate the cost of giving up the storage unit and make plans for the money.  Something fun and immediate for part of it, savings for half, and long-term fun plans for the rest.  Or donate to a favorite cause.  Knowing it will help others can help you.
  • See what you can sell (online, garage sale, consignment shop) and add that money to the above budget.
  • Talk with a therapist to address why it's so difficult to let go of stuff.  If you live with others or have family, have a frank discussion about how much easier it will be on one of you if the other happens to die first, or if either of you (or any family) need to do this process alone because one of you is in the hospital (or both of you die) and you need the money, or have to get the place ready to move out (gods forbid).
  • You may be able to find some guidelines online to probe why you feel you need to hold onto things.  If you have pictures of memorabilia, you won't have to let the memories go, but you won't have to deal with over-stuffed storage or the increased budget either.  If you realizes how much work it would be for others to have to deal with, you may realize it's your personal responsibility to downsize and not leave the burden to others, to minimize your impact on the environment, or to optimize your budget.  Use whichever tactic appeals to your values most.  If you've saved or made money in this process, you can use a portion of that to replace or update items you regrets getting rid of, if you ever realize you should have kept at least one sport coat, for instance.  
  • Get rid of everything that doesn't fit.  If you're hoping to lose weight, start with everything too large; if you're hoping to gain, with everything too small.  
  • Hang everything in the closet 'backwards' and if you wears something, hang it the 'correct' way after it's laundered.  After 3-12 months, remove everything that's still hanging backwards.  3 months should be enough time for daily wear items.  12 for seasonal items like heavy winter clothes or light summer things.  
  • Donate items directly (especially warm and waterproof winter stuff) to the homeless or needy, so you can see how much more they will value the items.
  • Choose a number of items to get rid of for every short unit of time, like one item per day or 5 items per week.  This will make the project more manageable.
  • For every new (or new-to-you) item you get, get rid of X number of items.  Two at least; up to ten if you have a lot of excess.  
  • Hold each item in your hand and consider if it is (a.) functional, (b.) brings you happiness, and (c.) flattering.  If it's not all three, find a way to get rid of it.  (There may be some exception to (b.) and (c.) for work or specific sport/activity clothing.)
  • If you're helping someone else with this process, do not remove anything without their consent and tell them you won't.  They needs to trust you so they can go through this process.
  • If you're helping someone in your household, others in your household should also do all of the above as fits each of you.  You may have fewer items so you'd offer to get rid of one item per week or 3 per month vs. their 1 per day or 5 per week, for example.  If you have the most stuff, you can ask them to do it with you in a similar, scaled manner.  If you're working at this together as a family it will help.  Every so often, each of you should look around and note how much more space you have, how much less time you spend organizing, how much easier it is to clean without moving stuff, how much easier laundry is, how much nicer life is, etc.